|
查看: 2481|回复: 9
|
mikro c- p16f877a 問題
[复制链接]
|
|
|
本帖最后由 alwayson 于 28-9-2010 08:40 PM 编辑
i. 你要想做什么? 你的应用是什么?
----小弟想在學着用mikroc 來寫一個program . 運用兩個infrared sensor 來做increment 和decrement 然後 display 在 7-segment led(common cathode).
ii. 你想要拿到什么效果
當有物體經過sensor1 然後sensor2。7-segment 會 increment by 1 (minimum 0 可以加到 maximum 10(會display F). 如果經過 sensor2 然後sensor1 會減 1, 可以從 F 減到 0。
iii. 你做了什么
小弟目前能做到 當有物體經過sensor1 。7-segment 會 increment by 1. 可以從 0 一直加 到 10(display F). 如果經過 sensor2 會減 1, 可以減到 0. programming 方面做到了, hardware 也跑得到,順利完成。 有用 real pic simulation 來試跑 ii.
iv. 你遇到了什么问题。
想要從 iii. upgrade 到 ii. 裡提到的效果。 目前已經做好coding 接著也已經試跑, 可是還是有點不穩定,有用 real pic simulation 來 試跑 可是問題出現 在應該 increment 時會執行 decrement 的command , 應該decrement 時 執行increment 的command. 這問題會在不一定的情況發生, 如:從 1 加到 2 ,然後應該increment 到3 試 會 減到1 回去, reset pic 後 問題可能會在應該從 5 加到 6時 突然 會減到4去。
v. 你用什么MCU?
p16f877a
vi. 你用什么语言? ASM /C/PICBasic/Keil?Compiler 版本?
c language. 用mikro c compiler
vii. 有源码吗? 如是抄来的请注明出处, 请放链接。
源码1:還沒’upgrade‘ 的源碼(自己做/已經成功做到的)
void initialize(void)
{
TRISD=0xF0; // Set PORTD pin 4 TO 7 as input. USE PIN 7 AS INCREMENT, PIN 5 AS DECREMENT
TRISB=0x00; // Set PORTB as output
PORTB=0x7E; // Set 7-segment led to zero
}
int detected_a=0;
int detected_b=0;
int d_zero=0x7E, d_one=0x30, d_two=0x6D, d_three=0X79, d_four=0X33, d_five=0x5B, d_six=0x5F, d_seven=0x70, d_eight=0x7F, d_nine=0x7B, d_full=0x47;
int count=0x00;
void main() {
initialize(); // Call initialization function
while(1) { //Loop forever
if(count<1)
{
PORTB=d_zero;
count=0;
}
else if(count==1)
{
PORTB=d_one;
}
else if(count==2)
{
PORTB=d_two;
}
else if(count==3)
{
PORTB=d_three;
}
else if(count==4)
{
PORTB=d_four;
}
else if(count==5)
{
PORTB=d_five;
}
else if(count==6)
{
PORTB=d_six;
}
else if(count==7)
{
PORTB=d_seven;
}
else if(count==8)
{
PORTB=d_eight;
}
else if(count==9)
{
PORTB=d_nine;
}
else if(count>9)
{
PORTB=d_full;
count=10;
}
if(Button(&PORTD,7,1,1))
{
detected_a = 1; //object detected by ir sensor
}
if(detected_a && Button(&PORTD,7,1,0))
{
count++;
detected_a = 0;
}
if(Button(&PORTD,5,1,1))
{
detected_b = 1;
}
if(detected_b && Button(&PORTD,5,1,0))
{
if (count > 0)
{
count--;
}
detected_b = 0;
}
}
}
源码2:已經’upgraded‘ 的源碼(自己做/沒有成功)
int detected_a=0;
int detected_b=0;
int d_zero=0x7E, d_one=0x30, d_two=0x6D, d_three=0X79, d_four=0X33, d_five=0x5B, d_six=0x5F, d_seven=0x70, d_eight=0x7F, d_nine=0x7B, d_full=0x47;
int count=0x00;
void initialize(void)
{
TRISD=0xF0; // Set PORTD pin 4 TO 7 as input. WE USE PIN 7 AS INCREMENT, PIN 5 AS DECREMENT
TRISB=0x00; // Set PORTB as output
PORTB=0x7E; // Set 7-segment led to zero
}
void DETECTION1(void)
{
//EXTRA
if(Button(&PORTD,5,1,1)) //EXTRA
{//EXTRA
detected_b = 1; //EXTRA
}//EXTRA
if(detected_b && Button(&PORTD,5,1,0)) //EXTRA
{
count++;
detected_a = 0;
detected_b = 0;
}
}
void DETECTION2(void)
{
if(Button(&PORTD,7,1,1)) //EXTRA
{ //EXTRA
detected_a = 1; //EXTRA
} //EXTRA
if(detected_a && Button(&PORTD,7,1,0)) //EXTRA
{
if (count > 0)
{
count--;
}
detected_b = 0;
detected_a = 0;
}
}
void main() {
initialize(); // Call initialization function
while(1) { //Loop forever
if(count<1)
{
PORTB=d_zero;
count=0;
}
else if(count==1)
{
PORTB=d_one;
}
else if(count==2)
{
PORTB=d_two;
}
else if(count==3)
{
PORTB=d_three;
}
else if(count==4)
{
PORTB=d_four;
}
else if(count==5)
{
PORTB=d_five;
}
else if(count==6)
{
PORTB=d_six;
}
else if(count==7)
{
PORTB=d_seven;
}
else if(count==8)
{
PORTB=d_eight;
}
else if(count==9)
{
PORTB=d_nine;
}
else if(count>9)
{
PORTB=d_full;
count=10;
}
if(Button(&PORTD,7,1,1)&& Button(&PORTD,5,1,0) )
{
detected_a = 1; //object detected by ir sensor
}
if(detected_a && Button(&PORTD,7,1,0))
{
DETECTION1(); //SWITCH2 DETECTED
}
//EXTRA
if(Button(&PORTD,5,1,1)&& Button(&PORTD,7,1,0))
{
detected_b = 1;
}
if(detected_b && Button(&PORTD,5,1,0))
{
DETECTION2(); //SWITCH1 DETECTED
} //EXTRA
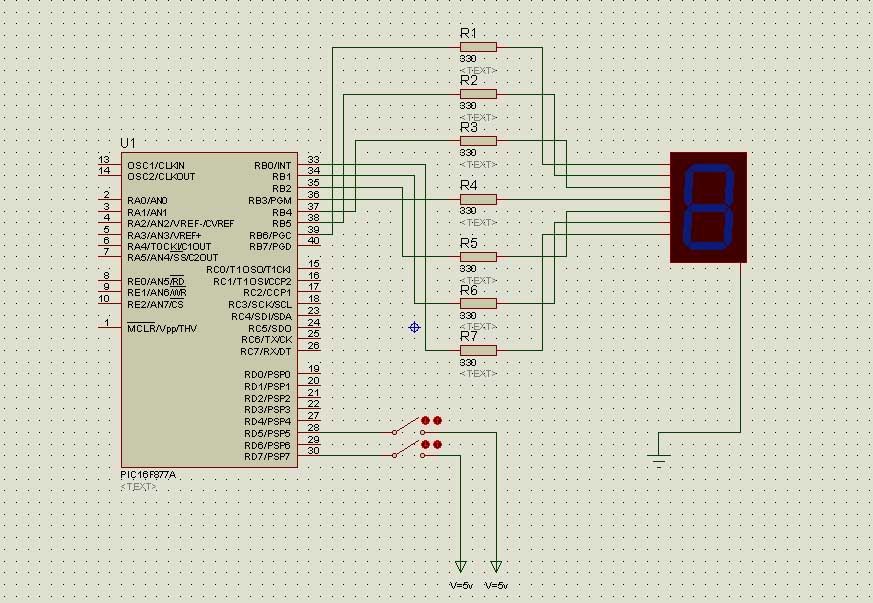
viii. 有电路图吗?
沒有
ix. 你google 了吗? 你的搜索关键字是什么?
沒有google
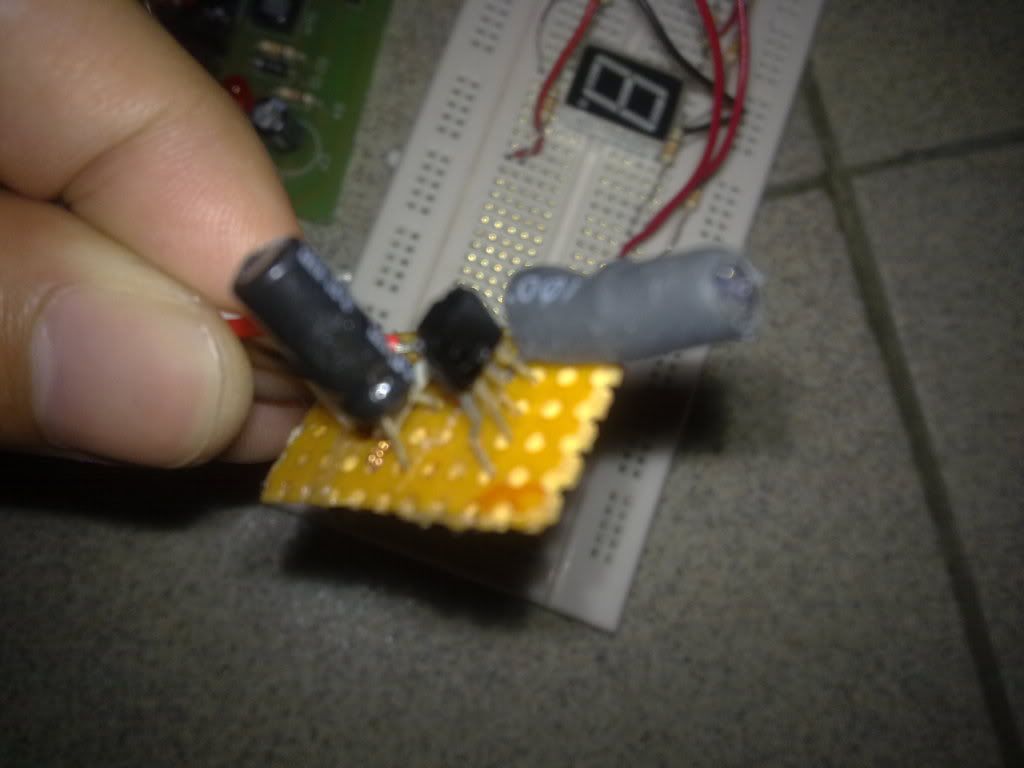
x. 有照片证明你做的东西吗?还是只是概念性的空谈?
如果一定要照片, 小弟過後會post 上來。 |
评分
-
查看全部评分
|
|
|
|
|
|
|
|
|
|
|
 发表于 29-9-2010 11:19 AM
|
显示全部楼层
发表于 29-9-2010 11:19 AM
|
显示全部楼层
可以看电路图吗?
我不熟悉Mickro C, Button() 是怎样用的?
还有, 你的Code 可以大大减化的, 现在忙, 迟些才仔细看你的code。 |
|
|
|
|
|
|
|
|
|
|
|

楼主 |
发表于 29-9-2010 06:21 PM
|
显示全部楼层
|
|
|
|
|
|
|
|
|
|
|
发表于 29-9-2010 06:50 PM
|
显示全部楼层
本帖最后由 pic 于 29-9-2010 06:53 PM 编辑
Button() , 是MikroC 的build in Function?
Button(&PORTD,7,1,0) 是什么意思?
Pord D? 7,1,0 是什么?
其实我是要问这个, 要知道这个function 有做Debounce 吗。。
看了你的电路图, Port D button 哪里没有Pull high 吗?如没有, 用4.7K pull high。 |
|
|
|
|
|
|
|
|
|
|
|
楼主 |
发表于 29-9-2010 06:59 PM
|
显示全部楼层
本帖最后由 alwayson 于 29-9-2010 07:02 PM 编辑
Button() , 是MikroC 的build in Function?
Button(&ORTD,7,1,0) 是什么意思?
Pord D? 7,1,0 是什 ...
pic 发表于 29-9-2010 06:50 PM 
對對, 這就是debounce. 也是mikroc build in function,. 小弟直接 copy/paste help 哪裡的解說吧。
unsigned short Button(unsigned short *port, unsigned short pin, unsigned short time, unsigned short active_state);
【Parameter port specifies the location of the button;
parameter pin is the pin number on designated port and goes from 0..7;
parameter time is a debounce period in milliseconds;
parameter active_state can be either 0 or 1, and it determines if the button is active upon logical zero or logical one.】
example:
reads RB0, to which the button is connected; on transition from 1 to 0 (release of button), PORTD is inverted:
do {
if (Button(&PORTB, 0, 1, 1)) oldstate = 1;
if (oldstate && Button(&PORTB, 0, 1, 0)) {
PORTD = ~PORTD; oldstate = 0; }
} while(1); |
|
|
|
|
|
|
|
|
|
|
|
楼主 |
发表于 29-9-2010 07:44 PM
|
显示全部楼层
回复 5# alwayson
是這樣子嗎?
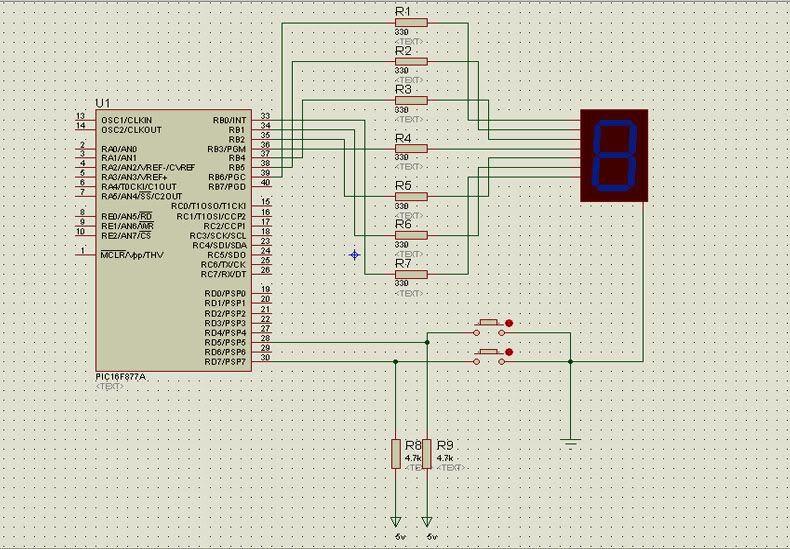
那麼sensor 的那邊也要改了,sensor 沒放電阻。。 |
|
|
|
|
|
|
|
|
|
|
|
发表于 1-10-2010 10:35 AM
|
显示全部楼层
首先, 感谢你尊重版规,尊重版主, 我回馈你的方法, 就是教你如何用Task Scheduler, State machine, Debouncing.
我没有用你的Mikro C code, 我用CCS C 写了一个, 这个code 对你来说, 应该会有很多疑问, 但是, 一旦大家学会后, 肯定用帮助, 而且, 可以写很复杂的code。, 读Sensor Input 是一个Task, 显示 也是一个task, 你还可以控制什么时候跑那个Task。
他不是真的Multi Tasking, 只是Round Robin Task Scheduler, 但是已经很好用了。
你可以参考, 不明白可以问。

- // By pic@cArI
- // Date : 1 Oct 2010
- #include <16F877A.H>
- #fuses HS,NoPROTECT,noWDT,put,nobrownout
- #use delay(clock=20000000)
- #use fast_io ( B )
- #use fast_io ( d )
- #byte PORT_A=0x05
- #byte PORT_B=0x06
- #byte PORT_C=0x07
- #byte PORT_D=0x08
- #byte PORT_E=0x09
- ///////////////////////////////////////////////////////////////
- // I/O Defination
- #bit iInc = Port_D.5 // DECREMENT
- #bit iDec = Port_D.7 // INCREMENT
- // LED Map
- byte CONST LED_MAP[11] = {0x7E, 0x30, 0x6D, 0X79, 0X33,0x5B, 0x5F, 0x70, 0x7F,0x7B,0x47};
- // GLOBALS
- char gc_sensor_timer;
- char gc_Display_timer;
- int Counter;
- int1 fiInc;
- int1 fiDec;
- ///////////////////////////////////////////////////////////////
- //Timer DEFINES
- ///////////////////////////////////////////////////////////////
- // With a 20 MHz oscillator, a RTCC pre-scaler of 256, and a RTCC
- // preload of 195, we get an rtcc interrupt rate of 100 Hz
- // This will be our "tick" clock that we use for various event timers.
- // RTCC interrupt rate = Fosc / (4 * rtcc pre-scaler * rtcc pre-load
- // = 20000000 Hz / (4 * 256*195)
- // = 100.1 Hz
- #define RTCC_PRELOAD (256 - 39)
- // Multiply the following values x 10 ms to get the delay times,
- // since each timer tick is 10 ms.
- #define Sensor_TIMER_TICKS 2 // 20 ms
- #define DISPLAY_TIMER_TICKS 10 // 100 ms
- //--------------------------------------------------------
- // The rtcc interrupt occurs when the rtcc rolls over from FF to 00.
- // We it to interrupt at a 100 Hz rate.
- //
- #int_rtcc
- void rtcc_isr(void)
- {
- // Reload the RTCC, so it will keep overflowing every 10 ms.
- set_rtcc(RTCC_PRELOAD);
- // Decrement any timers that are running.
- if(gc_sensor_timer)
- gc_sensor_timer--;
- if(gc_Display_timer)
- gc_Display_timer--;
- }
- void check_sensor(void)
- {
- char new_status;
- #define SwCounterSize 2
- static int debounce_counter_iInc;
- static int debounce_counter_iDec;
- if(gc_sensor_timer)
- return;
- else
- gc_sensor_timer = sensor_TIMER_TICKS;
- // Check Increment Sensor input and debounce
- if(iInc)
- {
- if(bit_test(++debounce_counter_iInc,SwCounterSize))
- {
- --debounce_counter_iInc;
- fiInc=1;
- }
- }
- else
- {
- if(--debounce_counter_iInc==0)
- {
- ++debounce_counter_iInc;
- fiInc=0;
- }
- }
- // Check Decrement Sensor input and debounce
- if(iDec)
- {
- if(bit_test(++debounce_counter_iDec,SwCounterSize))
- {
- --debounce_counter_iDec;
- fiDec=1;
- }
- }
- else
- {
- if(--debounce_counter_iDec==0)
- {
- ++debounce_counter_iDec;
- fiDec=0;
- }
- }
- }
- int Inc_State=0;
- int Dec_State=0;
- int fUpdateRequire;
- int fiIncOld;
- //--------------------------------------------------------
- void check_Display(void)
- {
- if(gc_DISPLAY_timer)
- return;
- else
- gc_DISPLAY_timer = DISPLAY_TIMER_TICKS;
- Switch (Inc_State)
- {
- case 0: // wait for signal
- if(fiInc==1)
- {
- Inc_State=1;
- }
- break;
- case 1: // signal high, wait it go low
- if(fiInc==0)
- {
- Inc_State=2;
- }
- break;
- case 2: // We get the signal, increase it
-
- Counter++;
- if(Counter>10)counter=10;
- Inc_State=0; // back, wait for next signal
- break;
-
- }
- Switch (Dec_State)
- {
- case 0: // wait for signal
- if(fiDec==1)
- {
- Dec_State=1;
- }
- break;
- case 1: // signal high, wait it go low
- if(fiDec==0)
- {
- Dec_State=2;
- }
- break;
- case 2: // We get the signal, increase it
-
- if(Counter>0)Counter--;
-
- Dec_State=0; // back, wait for next signal
- break;
-
- }
-
- // Display to 7Seg
- Port_B=LED_MAP[Counter];
- }
- void main()
- {
- // 76543210
- set_tris_b(0b00000000);
- set_tris_D(0b10100000);
- Port_B=0;
- Port_D=0;
- gc_sensor_timer = sensor_TIMER_TICKS;
- gc_DISPLAY_timer = DISPLAY_TIMER_TICKS;
- // Setup the RTCC.
- setup_counters(RTCC_INTERNAL, RTCC_DIV_256);
- set_rtcc(RTCC_PRELOAD);
- enable_interrupts(INT_RTCC);
- enable_interrupts(GLOBAL);
- Counter=0;// reset to 0
- while(1)
- {
- check_sensor();
- check_Display();
- }
- }
|
|
|
|
|
|
|
|
|
|
|
|
楼主 |
发表于 2-10-2010 11:20 AM
|
显示全部楼层
回复 7# pic
哇。。需要一段時間來消化, ccs c 的 format 真的很不同。。 |
|
|
|
|
|
|
|
|
|
|
|
楼主 |
发表于 2-10-2010 11:57 AM
|
显示全部楼层
小弟剛剛成功做到 ii 的效果了,是用mikro c。 很有滿足感
請問pic 老大,那個c compiler 會比較好用?小弟只接觸過 visual basic 和 mikroc, Hi-tech 看起來有點難用。。每個compilere 好像都用不一樣的format |
|
|
|
|
|
|
|
|
|
|
|
楼主 |
发表于 2-10-2010 05:21 PM
|
显示全部楼层
|
|
|
|
|
|
|
|
|
| |
 本周最热论坛帖子 本周最热论坛帖子
|


 变色卡
变色卡 千斤顶
千斤顶


 ORTB, 0, 1, 1)){ oldstate = 1;}
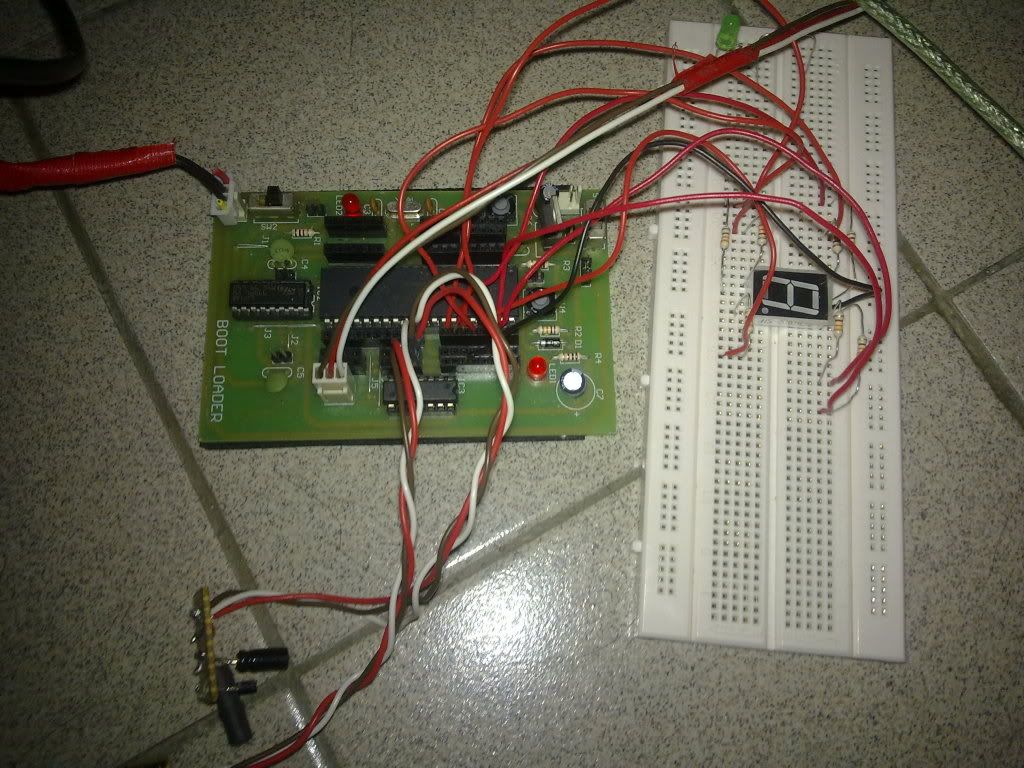

 )
)
 3348
3348  85
85